This is my very first attempt at etching my own PCBs. My goal was to design a two-sided board to hold four 256K serial EEPROMs (24LC256 Serial I2C EEPROM). The PCB is about 5cm long as you can see from the 0.1″ pitch. The lesson I learned was about using the correct paper to transfer the laser printer toner. I tried HP glossy photo paper first and failed spectacularly. This is not to say that the toner could not be transferred with this paper – the resolution is great. The only problem is that the glossy finish sticks to the board and cannot be removed without destroying the toner layer. I then switched to ordinary matte paper, which worked surprisingly well.
The image below shows the PCB after toner transfer, ironing each side for about two minutes and soaking in water for a few minutes. Removing the paper by rubbing slightly with your finders is a breeze. You can see that the toner was not properly transferred in a few places. My suspicion is that this is either due to poor cleaning as suggested on some websites or the paper soaking up the toner. I am curious as to whether anyone else had similar difficulties.
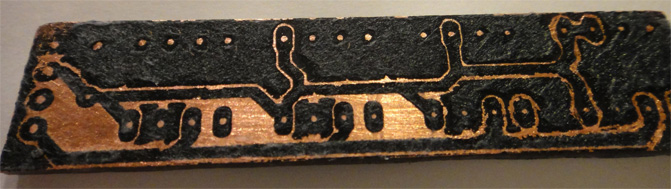
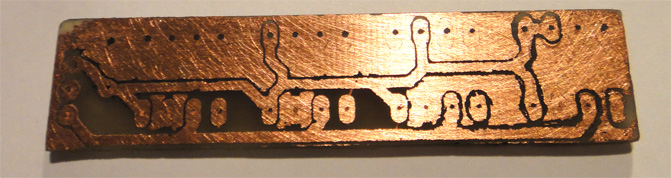
Using Eagle’s default 12(?)mil padding when pouring the copper turned out to be quite tricky. I had to cut many shorts that remained after my impatient etching. I will probably use at leat 20mil next time. A trace width of 32mil works perfectly given the paper quality. I could even afford to be a little sloppy when rubbing off the paper as you can see in the lower trace and some pads in the picture. This is the board after cleaning with acetone:
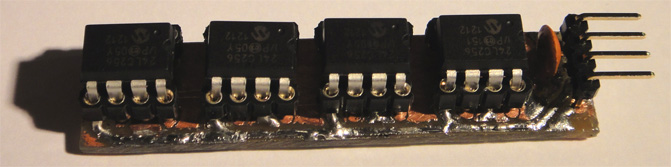
The finished board with EEPROMs (in turned pin sockets), a 100nF decoupling capacitor and a header to connect to my Arduinos: